Seguindo a linha dos comentários sobre o redwork, vamos agora para o bluework... estou pesquisando... para quem me conhece, isso é natural... e já dá para imaginar que logo estarei fazendo.
"Bluework é um desdobramento do Redwork vitoriana, uma forma popular de bordado do século XIX. Neste tipo de bordado, apenas o contorno de uma forma é bordado. Certas influências influenciaram este tipo de bordado superfície. Revistas femininas foram mais um incentivo, fornecendo: coleções livres de motivos, quando assinaturas eram renovadas. Disponibilidade de padrões de tecidos, fios e ready-made, todos contribuíram para a propagação de bordado ponto de contorno.Os pontos simples para Bluework foram Ponto Contorno, Stem Stitch, nós franceses, Stitch Straight, e Stitch Cruz às vezes, podendo transformar os trabalhos em itens elegante. Bluework tradicionais muitas vezes é necessária apenas uma cor de fio para trabalhar um projeto. O pano de fundo ou era branqueada ou crua de musselina, ou linho. Na maioria das vezes, os fios de escolha foram o fio de algodão bordado ou algodão perle. Escolhas de design preferido para Bordado Ponto Contorno, como uma categoria geral, incluem animais, flores, crianças brincando, pessoas famosas, pássaros, bonecas Kewpie e objetos de cozinha como bules e utensílios."fonte
Especial! Não é?
Segue um passo a passo de outro site:
Click on the image for a bigger version.
fonte
Segue um passo a passo de outro site:
This is just to give a feel on how bluework will look like.
Bluework and redwork share the same history. Only that, bluework came as a successor to redwork when a new colorfast blue thread was available in the market. Later, a lot many other colors came into availability and many other threads were experimented with. Contemporarily, bluework has been done in many shades of blue in a single design. I have used anchor thread number 0162 to work on the below given design.
Here is a step by step procedure on how this design was completed in bluework. Click on the stitch names to go to the lessons of each stitch.
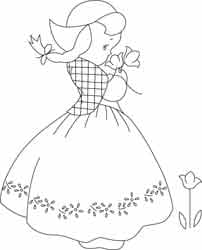 | 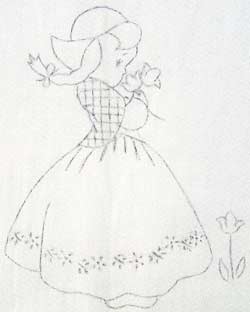 | |
| I have traced the design to a white cotton fabric using carbon paper. | ||
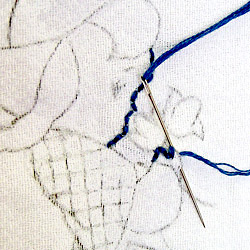 | Back stitch: I began by making the girl’s face, hands and feet using this stitch. | |
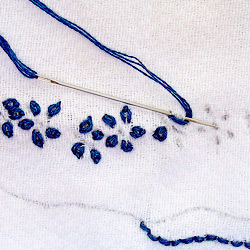 | Lazy daisy: The flower pattern on the frock is done in lazy daisy. I also made the girl’s eyes and ribbons using this stitch. | |
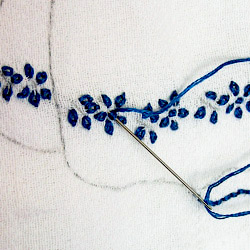 | French knot:The best way to fill in dots or small circles is using french knots, which I did on the frock, at the centre of each flower pattern. | |
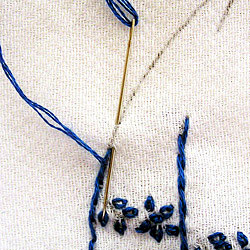 | Outline stitch:The outline stitch was used for the frock, shawl, and hat as it would give a thicker easy flowing look. | |
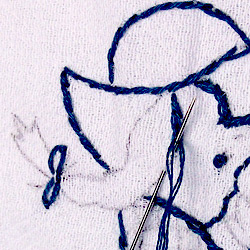 | Split stitch: The split stitch looked good for the hair as it would give a thicker look. Two strands of the blue floss were taken and doubled, so that the ‘spliting’ is easy. | |
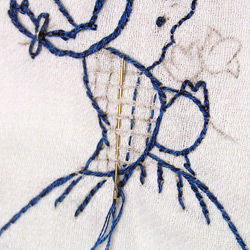 | Running stitch: The design on the shawl was apt for a running stitch. | |
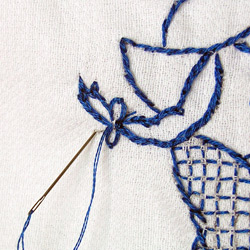 | Straight stitch: I added finer details to the girl by making single straight stitches (single running stitch). I made its eyebrows, eyelashes and the stem pattern on the frock using straight stitches. | |
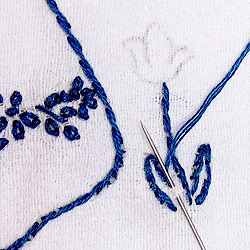 | Stem stitch: I used this stitch to do the flowers. | |
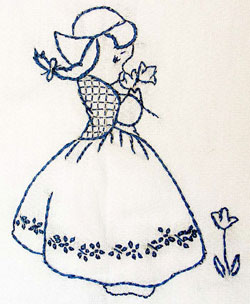 | Our finished ‘dutch girl’ would look like this. | |
fonte
Nenhum comentário:
Postar um comentário
Seu comentário é muito importante, faz com que possamos buscar informações cada vez mais relevantes.... Obrigada